Getting started collecting data with Spider
Spider is a web crawling and scraping platform built from the ground up in Rust for speed and reliability. It handles proxy rotation, JavaScript rendering, rate limiting, and anti-bot detection so you can focus on what to do with the data.
This guide covers the fundamentals: setting up your account, running your first crawl, and configuring Spider to handle real-world scraping workloads.
What Spider Does
Spider provides a single API that turns any URL into structured data. Here is what that looks like in practice:
import requests, os

headers = {
    'Authorization': f'Bearer {os.getenv("SPIDER_API_KEY")}',
    'Content-Type': 'application/json',
}

# Crawl a site and get LLM-ready markdown
response = requests.post('https://api.spider.cloud/crawl',
  headers=headers,
  json={
    "url": "https://example.com",
    "limit": 10,
    "return_format": "markdown",
    "request": "smart"
  }
)

for page in response.json():
    print(f"{page['url']} — {len(page['content'])} chars")
Under the hood, Spider handles:
- Concurrent crawling: thousands of pages per minute using a Rust-based engine
- JavaScript rendering: headless Chrome for SPAs and dynamic content
- Proxy rotation: datacenter, residential, and mobile proxies with automatic failover
- Output formatting: HTML, markdown, plain text, screenshots, or structured JSON
- Streaming: process results as they arrive instead of waiting for the full crawl
- AI extraction: pull structured fields from pages using built-in LLM integration
Getting Set Up
Using the Dashboard
- Register or sign in with email or GitHub.
- Purchase credits to start crawling. Credits work on a pay-as-you-go model.
- Navigate to the dashboard and enter a URL to crawl.
- Export the results as CSV, JSON, or download directly.
The dashboard is the fastest way to test a URL and see what Spider returns before writing any code.
Using the API
For production workloads, the API gives you full control over crawl parameters, output format, and delivery.
- Create an API key from your account.
- Store it as an environment variable:
export SPIDER_API_KEY="your_key_here"- Make your first request:
curl 'https://api.spider.cloud/scrape' \
  -H "Authorization: Bearer $SPIDER_API_KEY" \
  -H 'Content-Type: application/json' \
  -d '{"url": "https://example.com", "return_format": "markdown"}'
The API reference documents every endpoint and parameter. Client libraries are available for Python, JavaScript, and Rust.
Crawl Configuration
Adjusting a few settings before you crawl can save you credits and improve the quality of your results.
Request Modes
The request parameter controls how Spider fetches each page:
| Mode | When to use |
|---|---|
smart (default) | Automatically picks HTTP or Chrome based on page requirements |
http | Static pages, sitemaps, APIs. Fastest and cheapest |
chrome | SPAs, JS-rendered content, pages behind Cloudflare or similar protections |
Proxies
Enable proxy_enabled: true to route requests through Spider’s proxy network. This significantly reduces blocks on sites with anti-bot protections. For tougher targets, specify proxy_type as residential or mobile.

Headless Browser
Set request: "chrome" to render pages in a real Chrome browser. This is required for single-page applications and sites that load content dynamically with JavaScript.

Crawl Budget Limits
Set limit to cap the number of pages Spider will crawl from a starting URL. This is critical for controlling costs on large sites.
params = {
    "url": "https://docs.example.com",
    "limit": 50,       # Stop after 50 pages
    "depth": 2,        # Only follow links 2 levels deep
    "return_format": "markdown"
}
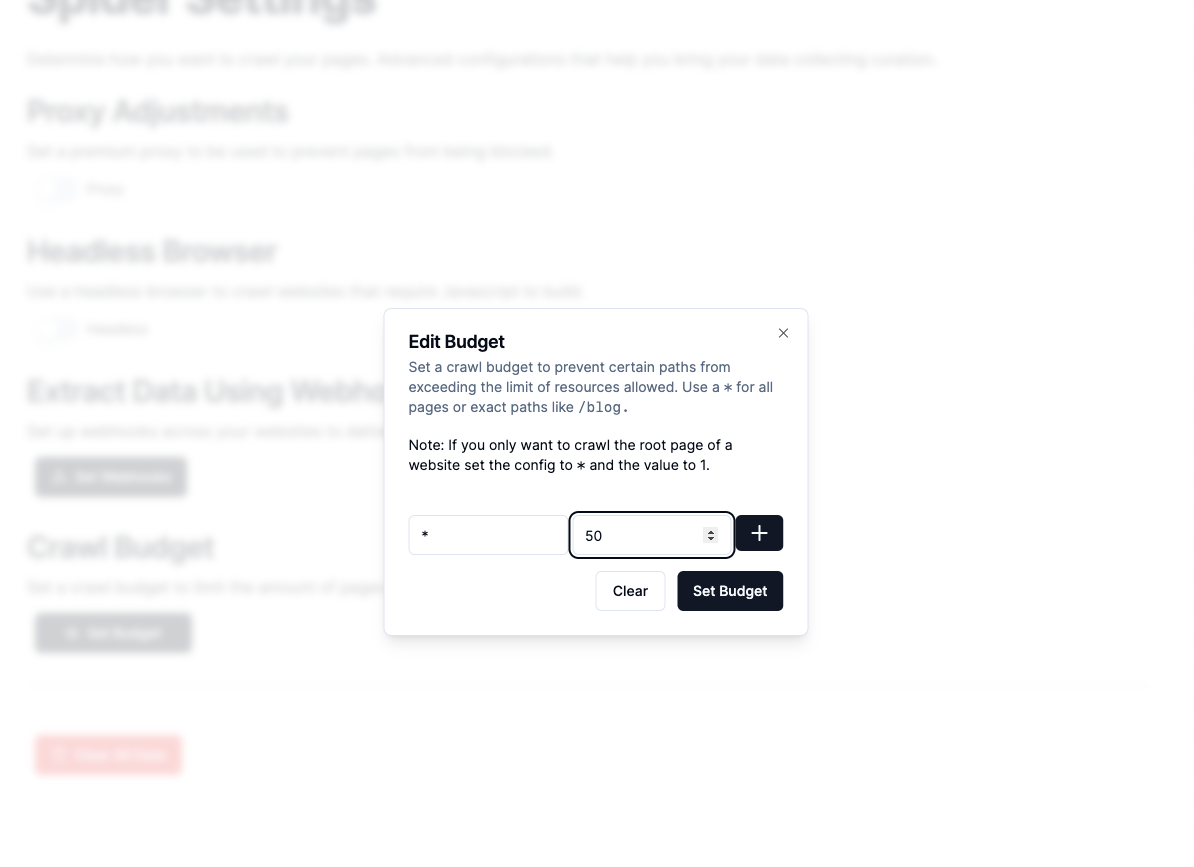
You can also configure budgets per-domain in your account settings using wildcard patterns. The example below limits all routes to 50 pages maximum:

Transforming Data
The return_format parameter controls what Spider gives you back:
| Format | Output | Best for |
|---|---|---|
raw | Original HTML | Parsing with your own tools |
markdown | Clean markdown | LLM ingestion, RAG pipelines |
text | Plain text | Search indexing, NLP tasks |
bytes | Raw bytes | Binary content, downloads |
For AI and LLM workflows, markdown strips out navigation, ads, and boilerplate, giving you just the page content. This pairs well with streaming for real-time ingestion into vector databases.
# Get markdown for a RAG pipeline
response = requests.post('https://api.spider.cloud/crawl',
  headers=headers,
  json={
    "url": "https://docs.example.com",
    "limit": 100,
    "return_format": "markdown",
    "request": "smart"
  }
)

for page in response.json():
    # Each page is clean markdown ready for chunking
    chunks = split_into_chunks(page['content'])
    embed_and_store(chunks, metadata={"url": page['url']})
Streaming Large Crawls
For crawls over a few dozen pages, use streaming to process results as they arrive. Set the Content-Type header to application/jsonl and enable stream=True in your HTTP client:
import requests, json, os

headers = {
    'Authorization': f'Bearer {os.getenv("SPIDER_API_KEY")}',
    'Content-Type': 'application/jsonl',
}

response = requests.post('https://api.spider.cloud/crawl',
  headers=headers,
  json={
    "url": "https://example.com",
    "limit": 200,
    "return_format": "markdown",
    "request": "smart"
  },
  stream=True
)

with response as r:
    r.raise_for_status()
    for line in r.iter_lines(decode_unicode=True):
        page = json.loads(line)
        print(f"Crawled: {page['url']} ({page['status']})")
Streaming reduces memory usage, gives you faster time-to-first-result, and avoids HTTP timeouts on long crawls. See the streaming docs for more details.
Open Source
The core crawling engine is fully open source at github.com/spider-rs/spider under the MIT license. Spider Cloud adds managed infrastructure, proxies, and the API layer on top. If you want to self-host or contribute, the open source project is the place to start.
Credits and Pricing
Spider uses a credit-based system where $1 = 10,000 credits. Credits are deducted per page based on the features used (proxies, Chrome rendering, AI extraction, etc.). You can track your usage on the usage page.
When you purchase credits, a subscription is created that allows pay-as-you-go usage when your balance runs out. The spending limit scales with your purchase history. A $5 purchase gives roughly $40 in spending capacity.
For more details, see the pricing page.
Empower any project with AI-ready data
Join thousands of developers using Spider to power their data pipelines.